Showing posts with label organization. Show all posts

11 July 2013

Big Post of Packing and Moving Tips

I'm about to move cross-country for the third time in three years.  So I thought maybe I should actually write a post about how I do it.  I've pretty much got it all figured out.  ;-)

Let's get this out of the way: We move by packing our own boxes, loading our own boxes onto a semi truck, and then letting the semi truck moving company drive our stuff to its destination.  We pile into our car, beat the semi to our new home, then unload it when it shows up.  So all these tips are from that perspective.  We do it this way because we've found it's the cheapest for cross-country moves. Yes, even cheaper than renting a U-Haul and driving ourselves (gas is expensive), in addition to considerably less stressful. Neither Norman nor I wants to drive a U-Haul towing a car, nor does one of us want to be alone with Lucy while trying to drive that far.

Tip #1: Keep track of all expenses.

The IRS allows a tax deduction for expenses incurred during moves for changing jobs. (See the specific qualifications here.) If you qualify, you can deduct the costs of packing materials, transportation of your belongings and yourself, gas or mileage, hotel (but not meals), some storage costs, and some other stuff. Check the link. Keep track even if your employer will be reimbursing you -- you can still take a deduction on any qualified expenses that your employer won't reimburse for.  You'll need to file Form 3903.


Tip #2: Check out MovingScam.com.

This website helped me a ton before the first of our major moves.  They have hundreds (thousands?) of reviews of moving companies.  Definitely check the forums there before deciding on a company.  The forums also have pages and pages of packing tips -- it's where I got most of the ideas I implement.


Tip #3: Declutter before you start packing.

Maybe this is just me, but I can't declutter while I pack.  When I'm packing, I'm in packing mode, just trying to get everything to fit snugly and safely in the box.  I can't think about whether or not I want to keep the things.  So I sweep through the house for a while looking at everything and thinking, "Do I really need this? Do I use it? Do I want to pack it? Do I want to pay for the space on the truck necessary to transport it?"  It's easy to do most of this while you're going about life.  When you're putting dishes away, stop for a second and think about the things on the next shelf over.  When you're picking out clothes in the morning, think about the pieces in your closet that haven't been touched in the last year.  This phase can be going on while you're gathering packing supplies or finalizing your decision to move.


Tip #4: Start packing as soon as your know for sure that you're moving.

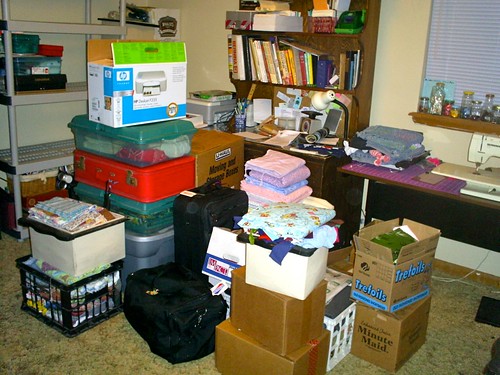
Fact: It will take you longer to pack than you think it will.  Start as soon as you can by packing stuff you can do without until after you move.  I usually start with seasonal items, books, craft supplies I don't use often, nicer china and the like, and stuff that is already in storage.  If you get done packing things you won't need way before you feel comfortable starting to pack things you *will* need, lucky you! Go for a spa day or take your kids to a museum or something.


Tip #5: Get the right stuff for the job.

Even though we move on a budget, I still want to use the right tools and materials for the job, because in the end, a few extra dollars will make my life way easier.  So here, in my opinion, are things to buy and things not to buy for packing and moving:

Don't buy:
*Boxes. These are free everywhere. Check Craigslist and Freecycle. Ask friends. Check your local liquor store. Here's a list full of suggestions of places to get free boxes.
*Bubble wrap. It's really not necessary. Paper, good technique, and your old towels will be perfectly fine. Not to jinx myself, but in two moves, we haven't broken one thing. Not one.

Do buy:
*Certain boxes. Yeah, I said don't buy boxes. But you really do need:
1.) Dish packs. These are large, extra sturdy boxes meant for filling with dishes. Get some cell packs to go along with them for your drinking glasses.
2.) Frame corners set. Like this. They'll fit almost any size framed thing. This would be for very large art or posters framed with glass.
3.) Wardrobe boxes. Actually I never bought any of these. Pro: You take your hanging clothes out of your closet, you hang them in the box, you pull them out, you put them in your new closet.  Saves a lot of time.  Con: Your clothing will take up more space in the truck that way. I've always taken the clothes off the hangers, put most of them into our extra luggage, and put all the hangers in one giant box.


*Packing paper/newsprint.  Really, just do it. I get mine from U-haul. It's blank newspaper. It comes all compact in a box. You don't have to save up newspaper and circulars for forever. And most importantly there's no ink to come off all over your dishes.
*Mattress bags. Super easy. Just spend a couple bucks and buy these. You just stick your mattress in (with the top sheet if you really want), tape it -- boom. Mattress stays clean.
*I use an old egg crate foam mattress pad to protect my picture frames. (I either had it from college or bought one at a thrift store -- I don't remember.) Just cut it up with scissors to the sizes of the glass in your frames, place the piece of foam on the glass, then wrap the whole thing in packing paper like a present. Then label the outside with a word or two that will tip you off to what is inside. You can also use bubble wrap (if you happen to have some) or wadded up paper to pad the glass.


*STRETCH WRAP. This one is so important I'm yelling it at you.  BUY SOME STRETCH WRAP. Your life will be so much easier.  I think we've gone through 3-4 rolls of 5" wide 1,000 ft stretch wrap on each move.  Use it to secure the lids on Rubbermaid tubs and the drawers of plastic organizers, wrap removable bookshelf shelves together, wrap folding furniture shut, wrap tall skinny things together -- last time we even used it to just wrap our flatware into its drawer organizer.  Endless uses.  You'll probably also want a much wider roll to wrap up couches and to secure moving blankets onto wood furniture.


*Packing tape dispenser. I almost forgot this one because it seems so obvious to me. (But I use packing tape for packaging Etsy items several times every week.) Definitely pick up a packing tape dispenser and several extra rolls. Doesn't have to be anything fancy -- I use one of these.

You'll also need moving blankets and a dolly/handtruck. These are included with the moving company we use, but if they're not you need to buy or rent.  Sometimes it'll be cheaper to buy a bunch of old blankets from thrift stores, then donate them to another thrift store on the other end.


Tip #6: Pack (and unpack) one box at a time.

Do not, under any circumstance except the most dire, have more than one open, half-packed box going at once.  Start packing a box, fill it as best you can with relevant items (i.e., items that will go in generally the same area in the new house), pad the rest of the box with extra linens or wadded paper, taped it up, then and only then, start filling another box.

Same goes for unpacking.  Unless you're just desperate for a specific kitchen utensil or something, don't leave half-unpacked boxes sitting around.  Find a place for everything from one box (even if it's not ideal -- you can shuffle and perfect organizational systems later), break the box down, then open another box.  This will save you mental energy because you won't have to keep track of what's going on in more than box at a time, and it will save floor space as you pack and unpack, which will help save your sanity.


Tip #7: How I label boxes

I read about this method somewhere (probably the MovingScam forums), and I just thought it was brilliant. It is, it's brilliant. It's the only way to label and inventory boxes for moving long distances, in my opinion.  Here's how it works:

You need:
*An index card organizer
*A pack of index cards
*A hole punch (optional -- some index card organizers are two-ring binders)
*A pen
*A Sharpie

You're going to write a code on each box (on the top and on at least two different sides) in Sharpie. It's going to look like this:  CR#11

The first two letters are an abbreviation for the room the stuff came from (you can make up whatever abbreviations make sense to you); the number is which number box from that room it is. (So this one is the 11th box from the craft room.)


Then write the same code on one index card.  Underneath, write everything you put in the box. It's a 3x5 card, so you have plenty of room.  Especially if you're packing kitchen stuff, you're going to want to know exactly what is in each box.

Keep the index cards organized in order, by room and number, in the index card binder.

Then, when you get to the new house, you can tape signs to the doorway of each room with the room code, so whoever is helping you unload can at least attempt to put everything in the right room.

This method will also enable you to:
*Cut down on theft if someone else is handling your items. If the outside of the box doesn't say "Bluray player", it's a lot less likely to get stolen.
*Check off everything as it comes off the truck.
*Give yourself a nice visual checklist when unpacking. Once a box is unpacked, throw away the index card that goes with it. The binder of cards will dwindle, and you'll feel like you might actually be making progress even though your house is a giant mess.
*Easily compose a household inventory for insurance purposes.


Find more tips: 

There used to be a fabulous website that showed, in depth, how to pack every kind of thing in a house. The kitchen section was especially helpful, and it's where I learned how to pack all the different kinds of dishes I have.  Sadly, the website is gone.  However, this video does a pretty good job of explaining the basics.  (Caveat -- for goodness sake, do not individually wrap every hardback book you own in paper. Overkill.)  Additionally, I've been trying to gather websites with excellent packing and moving information on this Pinterest board.


Bonus tip that maybe no one needs but me:  Stuff giant bean bags into twin mattress bags.


 And then... you just have to unpack everything in your new place. Good luck!


If you have questions or other tips, leave a comment! I will be adding to the post if needed!

26 March 2013

Playroom Cleanup

Lest anyone is under the mistaken impression that I am 1.) a meticulous housekeeper, or 2.) a strict disciplinarian, I offer the following for clarification:

[Lucy's playroom]

It's looked this way for the last... two weeks? At least? Probably more because we were on vacation last week and it was like this before that.  

Every now and then Norman or I will go in and put some things where they go. We don't make Lucy clean it.  It's her room, and if she doesn't clean it, the consequence is that playing is harder and she can't find stuff.  Also I understand the frustration of having to clean up a "mess" when you're in the middle of creating something.

Lucy has free rein over safety scissors and a large amount of paper, scotch tape, stickers, and writing instruments.  She creates paper trash like nobody's business. She's quite prolific and is not sentimentally attached to most of it.  She also makes quite a mess of the drawers that all these craft supplies are kept in, of course. 

And every now and then, I just can't stand the playroom anymore.  I just can't stand that much of a mess for too long.  Plus I feel sorry for Lucy.  I know when it gets that bad, there's just no possible way for her to even begin to clean it.  Like, it's developmentally impossible for her.  So about every two months or so, I go through and really clean everything out and toss the scribbled on and cut up bits of paper and junk mail that she hoards.  Today she helped... a little.  I put everything where it goes and cleaned out and organized the craft drawers.

I got rid of almost a whole trash bag full of stuff (mostly paper).  But only the stuff she won't miss.  One of my earliest traumas was my dad going through my room and giving away a bunch of the toys I had left on the floor.  I was about Lucy's age.  I know he was doing the best he could, just like I am.  I'm about the same age now as he was then.  But man did that suck.
 
[Ahh, lovely.]

So it'll look half-decent for the next day or two. :-)

10 January 2012

New Crafting Space

And by "new", of course, I mean that I've lived here and had the room put together for 5 months but I'm just now getting around to posting photos.

 
[Car. Driveway.]

My fabulous husband insists that I have a crafting room*.  A family of three should normally be able to get along just fine in a two-bedroom, but not us!  We picked this house because it has a nice double living room (all the way).  The converted garage is off the main living room.  The high ceilings and big window make it pretty much perfect for holding all my crafting stuff without it looking like a cave.  And since it's right next to the living room, Lucy doesn't seem to mind as much when I work while she's playing or watching TV. 

We did, however, have to get a little creative with the toddler-proofing...

[Toy Shelf + Baby Gate + Filing Cabinet]
[The curtains are to keep our warm gas heater air out of the rafters at night.]

Before we moved, I got rid of my sewing table, one small bookshelf, and a set of plastic drawers.  And when we got here, we put the Britney shelf in the storage/mud room -- that room needed it more than I did.  To compensate for some lost storage space, I made what is possibly the tallest stack of under-the-bed Rubbermaid containers in the world, or at least in Humboldt County.


All full of different types of fabric. I think my corduroy collection is taking up three of those...


I can't really complain about the layout -- I have enough space, and I can see all my supplies pretty well.  My only problem is lighting (the room has no built-in lighting), which I could fix if I weren't such a cheapskate.  I think I need one of these.

 
[Squeee! Yes, those are old, giant, pull-down classroom maps standing up in the corner! Updates when I finally make the project I have in mind for them. (Thanks, Dad!)]

Sometimes I have visions of rigging up a pulley system to hoist my lightbox up into the high ceiling and out of my way. Probly not gonna happen.


If you absolutely must have more photos of this and my other crafting spaces, I have a Flickr album of them here.  And if you want to see tons of other photos of other people's awesome craft rooms, you should search "craft room" on Flickr.


*His reasons are three fourfold:
1.) I have a calling to craft (and I enjoy it, and I'm good at it).
2.) I have a tendency to... acquire, which is curbed by having to keep it all in one room.
3.) He doesn't want to put up with my projects being scattered all over the house.
4.) (Added by him before press time, and I quote:) "I like the moneys!"
So as you can see, it's a mixture of encouragement, tough love, and selfishness.  I'll take it!

23 November 2010

Shipping

[My drawer of packing and tagging supplies]

This is a post on how I do shipping. I will not blame you if, as a person who neither runs an Etsy shop nor ships anything on a regular basis, you just skip this post and come back for the next one.

If, however, you are an Etsy seller, or you do ship things fairly often, you might want to pay attention. I don't want to toot my own horn or anything, but I've pretty much got it all figured out. As the commercials say, shipping is complicated. Then the commercials go on to explain how it's not complicated if you just hand the US Postal Service a bunch of money without researching your options. Don't listen. If you want to save yourself and your customers both money and hassle, you've got to know what you're doing.

First of all, buy a postal scale. If you sell things on Etsy you must have a postal scale. Guessing at how much shipping will cost for your item is not good enough. I did this when I first started. You won't be good at it, and it will cost you money. You don't need anything fancy -- just something to tell you how many ounces something weighs. Digital or analog is fine. I found an analog one at a garage sale for 5 bucks.

[My trusty garage sale postal scale. Hey, that rhymes!]

Then, when you're going to list something for sale, you're going to weigh the thing, with approximately what you're going to ship it in, and any extras you plan to send. Most of my items fit in an envelope. I usually add some bubble wrap or tissue paper, and a business card and a note. Weigh this all together, and make a note of it wherever you prepare your item description. (You do write your item descriptions ahead of time, right?)

Then, if you're selling on Etsy, you're going to create a different shipping profile for each weight. I have one shipping profile for things I can send in a normal envelope with a stamp (which I call "1 oz flat"), and a profile for each ounce weight from 1 to 13 ("1 oz", "2 oz", etc). Most of my items weigh 13 ounces or less, so I stop there. If I ever sell something that weighs more than 13 ounces, I look up the cost on USPS.com when I'm writing the description and make a note.

13 ounces is a very important cut off. Above 13 ounces, you cannot ship a thing by First Class Mail. You must ship it Priority or Parcel Post. Priority costs a lot more than First Class, and Parcel is slow and just generally no good. At and under 13 ounces, Priority is NOT faster than First Class. It's not. Don't waste your money.

[One of my handmade envelopes, and a stack of others waiting to be assembled]
[And a pretty pink hammer and a sewing machine foot]

Back to those Etsy shipping profiles. You're going to have to do some work to get this all set up. First, go to USPS.com and find the price tables. (Oh look, I've done it for you! First Class. Priority. International First Class.) Then you're gonna wanna set up an Excel file or something. I do a sheet for inside the US, a sheet for Canada, and a sheet for all other countries. (The prices to Canada are the same as the prices to some other countries, but not all. I make it easy on myself and break it down that way because most of my international customers are in Canada.) Break it down by ounce if you sell small things, or pounds if you sell big things.

Now, here's the thing. You don't just want to plug the prices from the USPS website into your Excel file. Well, maybe you do, but I don't think you do. You need to figure out how much it actually costs to ship something. You need to factor in extra money for Delivery Confirmation (we'll come back to that), extra PayPal fees incurred from shipping charges, shipping supplies, and your time. If you'd rather not figure these into your shipping charges, you need to remember to factor them into your product prices.

I personally do the following: For items mailed inside the US, I take the price on the website, plus $0.19 (Delivery Confirmation), plus another small amount (for shipping supplies, PayPal fees, etc, and no, I can't remember what number I decided on -- I did this a long time ago and I haven't had to think about it since). For Canada and the rest of the world, I just do the price from the website plus the other small amount, because you can't get Delivery Confirmation on packages going outside the US.

So now you've got these in your Excel file. Then you want to go to Etsy. Click "Your Shop", then "Shipping" (under Items). At the top of the page there's a link that says "Create or edit shipping profiles". Click on that, then on the link that says "Create a new profile". Give it a name (like "3 oz."), then pick a country that you want to ship to. Click "add", then it will let you fill in the price (from your Excel sheet). Do this for however many countries you want to specify. At the bottom of the page there's a place for "Everywhere Else". That's for all the other countries that you don't specify. So, for instance, on my profiles, I have one for the US, one for Canada, and then I fill in the Everywhere Else.

Do this for each weight. Then when you list an item, you only need to know how much the package will weigh, and you can just pick the correct profile while you're listing it! So easy.

[My other shipping supplies in a closet organizer]

Now, back to Delivery Confirmation and all that jazz. The USPS regulations got really weird a few years ago. There are now 3 different classes of First Class package. There's a "Letter", which is what you would normal think of as a letter. These can only weigh up to 3.5 ounces, and they have to be perfectly flat. There's a "Flat". These exceed any one dimension of a "Letter", and can only be up to 3/4 inch thick. And there's a "Parcel". These are boxes, thick envelopes, or tubes that are bigger than a "Flat".

Here's the thing about this that is so messed up: You can only get Delivery Confirmation on "Parcels". The important thing about this for the types of items I sell is that "Parcel" must be more than 3/4 inch thick. If you use PayPal to print shipping for your items, it automatically adds Delivery Confirmation. So, as a result, if you print a PayPal label and put it on something that is less than 3/4 inch thick, and they catch you, whoever receives the package will have to pay the upgrade to Priority. Because you can put Delivery Confirmation on any Priority package. Ah, bureaucracies... (Side note: I just accidentally spelled that word "bureaucrazies". Yep.)

Soooo, when I mail my coffee cup pouches, for instance, I stuff the pouch with wadded up tissue paper before I put it in the envelope to make sure the envelope is more than 3/4 inch thick. I made myself a strip of cardboard with a long 3/4-inch-thick strip cut out of the middle to measure my packages to make sure they're thick enough.

[Like so!]

Why go to all this trouble? Because printing a shipping label with PayPal is totally easy. It's faster and more convenient than waiting in line at the post office, and it takes the money out of your PayPal account, so it makes accounting easier. I send my mail with my husband in the morning and he drops it off in the mail box. I used to just leave it out for my mailman, because the mailman at my old apartment was awesome and the best mailman ever, but the ones at my new house are crap. Really. So, you might be able to get away with leaving them for your mailman. You'll have to work that out for yourself.

However, if your package that you printed postage for weighs more than 13 ounces (again with the 13 ounces!), you have to take it into the post office and give it to a postal worker by hand. I don't know why, but that's the rule. It says so on the outsides of the drop boxes.

Also, you cannot print First Class International postage from PayPal.  [Edit: I believe this has changed recently, thank heaven!]  That is really the only reasonably priced way to ship things out of the country. But international shipping is pretty much a whole other blog post!

OK, now that I've written an epic tome on the subject of postage, I'm going to stop. I know there are things I've forgotten. If you have any questions, e-mail me (phile_1013 [at] hotmail [dot] com) or leave them in the comments.

09 March 2010

Puzzle Bags


Remember those wooden puzzles I found while curb shopping? And recall how I said I would make each of them a drawstring bag so we could keep the board and the pieces together?

Ta da! (Only 5 months later. That's pretty good, actually.)

[Zippers instead of drawstrings]

[My stop light is upside down. Oops.]

[Remember? There are two number puzzles. One for a boy, one for a girl!]

[Breakfast!]

[This puzzle is weird.]

[This is a set of farm magnets.]

02 October 2009

Extreme Makeover: Freezer Edition


I recently acquired a large amount of meat. And turkey broth. The meat came from my mother-in-law and an Angel Food order. The turkey broth came from some of the meat from my mother-in-law. So I'd just been throwing stuff in there whichever way it would fit. Not good, my friends. Don't ever do this.

So in order to cook and grocery shop efficiently, I decided it was time to reorganize. I also didn't have anywhere to put the turkey broth, which I made because I didn't have anywhere to put a whole turkey. Oops.


Between my kitchen table and the extra card table I set up for the occasion, everything was out of the freezer and in plain view. I wrote down everything and then put it all back, but better. Much better stacking. Much better use of door rack space. And somewhere to put my broth.


Hopefully I will remember to actually scratch things off the inventory as I use them. Ha. Probably not.


(And yes, I realize this post is much less compelling than it would have been with before shots. Again, oops.)

04 August 2009

Craft Room, Finale

Well, the craft room is completed. I mean, there's still some stuff sitting around in piles, but that's how it'll be anyway, so I'ma call it done.

Here's how it looked with all the fabric piled up in it before I put it all away.


I should have taken photos as I was sorting the fabric, but I just wanted to get it done!
I sorted them into types and then decided where each type would go. As I put them away, I took out what I didn't need (OK, what I didn't want), and set it aside for garage sale or the supply shop.

And here is the finished product!


That's right, I'm already crafting. I was desperate to make some more cloth wipes and diaper covers for Lucy. After that, new personal hygiene products for me, about 4 months worth of mending, more shipping envelopes, and more Scrabble coasters. Whew! Lucy, you best get to taking longer naps!

28 July 2009

Craft Room, part 3

In case you're new to this blog, I recently moved and gained a craft room. (Yay!) However, I have a three-month-old daughter, so it is taking me an inordinate amount of time to get it all organized. (Boooo!) So I've been posting update photos. The first two posts are here and here.

The major improvements lately are
1.) The middle of the floor is almost completely clear, which means everything but the fabric is almost completely put away (which isn't saying too much, considering the massive amounts of fabric currently living in the garage.)
and
2.) Pretty ribbon holders!

Niiiice...

I took 12" dowel rods that I found with the cake decorating supplies at Walmart, cut slits into the ends with a jigsaw (actually, the husband did that part), and basically made a triangle around the dowel out of string. The string slips into the slits on the ends of the dowels, and then ties in a knot at the top.


And here is the famous Britney Spears shelf (because it's tall, thin, and shallow). Har dee har har. Come to think of it, we should really update our pop culture references... Any suggestions?

17 July 2009

My New Kitchen

And by "new" I mean that I moved, so it's new to me. Not remodeled or anything. I made putting the kitchen together a priority when we got here, because an un-put-together kitchen gets very expensive (in dinners out) very quickly. So it's been like this awhile, but I thought I'd finally take photos and show it to you.


Here's the view from the living room. Spacious, no?


The pantry. I have a pantry! I've gotta be honest -- it was a major selling point (renting point?) for me. It's certainly not put to its full use at the moment though.


I love magnetic poetry. Some children-friends of ours put the words on the fridge for me. A little haphazard, but if I had had to do it myself, they'd all still be in a ziplock bag.


Little cookbook shelf. The two most important books in my life right now are on the top: The Baby Book and Nourishing Traditions. ("Hippie!")


A very moody photo of the window above the sink. Herbs!


And here is my collection of fake plants above the window above the sink. I cannot get enough of these crazy, 3D embroidery houseplant portraits. Seriously. If you ever see one, buy it for me and I'll reimburse you.


My collection of jars. It's getting a tad out of hand. And this isn't including the 10 or so jars full of kombucha in the fridge, or the 8 or so jars I just took out to put my button collection in.


The view out the window. Laundry, FTW!

10 July 2009

Craft Room, Part 2

As promised, here are the photos that I took of the craft room yesterday. The first photos can be seen here.


I put some more stuff on the desk hutch, and moved some plastic drawers out of the corner.


Cleared some stuff off the giant shelf, and got my yarn collection into those drawers in the corner.


Moved the shipping supplies in the closet over to make room for the tower of plastic drawers. Hopefully they will eventually hold all my finished inventory.

The big thing I did last night (that you won't be able to see in photos) was moving all the fabric to the garage and all the everything else into the craft room. I decided that I would put everything besides fabric in place and then fill in the holes with fabric. Otherwise there were just too many options.

More progress reports as progress happens -- the sewing machine should go up soon!

09 July 2009

Craft room!

What's that you say? You haven't heard from me in two months? Well, I hope you'll forgive me when I explain that I had a baby and moved across town. Now, in my time in Norman, OK, I've moved across town four different times, but this was very different. Babby means that just keeping the new (nicer, bigger) house clean takes up a lot of my free time. So although we've been here for over a month, there are still quite a few boxes lounging about.

However, this last weekend my fabulous husband got all the furniture in my craft room (!!!) in place. This means I can get everything else in order in little bits and pieces as I have time. Which means you -- you lucky blog reader, you -- get to watch the progress as it unfolds.

I should've taken photos before, when everything was just piled in there, but it was really depressing to look at.

So here's the first set of photos:


Looking across the room from the door


This is everything that was done by Monday night. Tomorrow I'll post the photos I took this morning.